
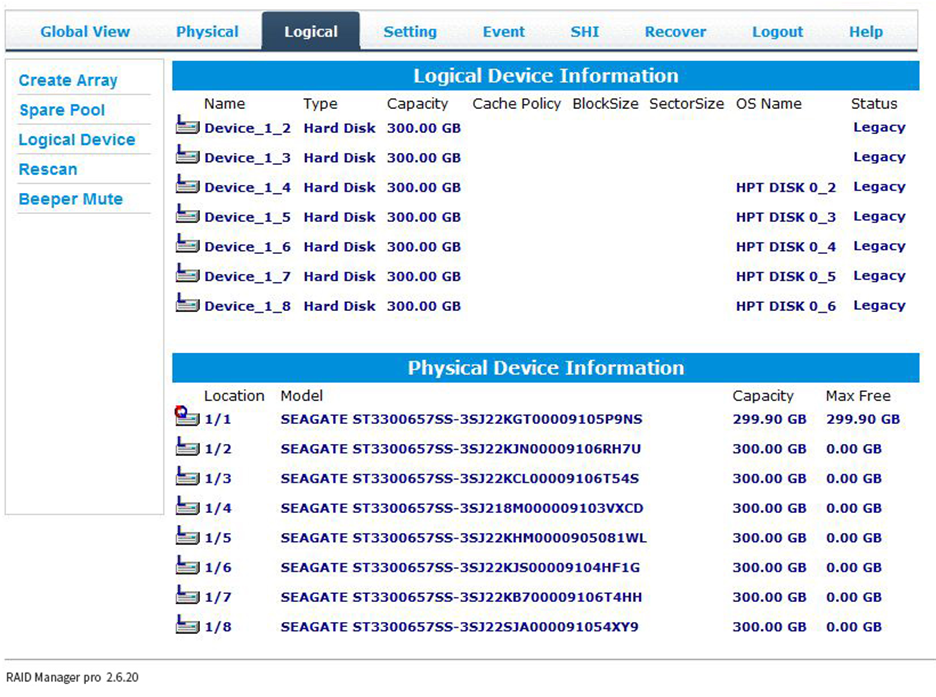
Logical Device Information: offers information about the logical disks
Physical Device Information: offers information about the HDD.

Create Array
Array Type: RAID types 0, 1, 5, 10, and JBOD are supported
Array Name: RAID name
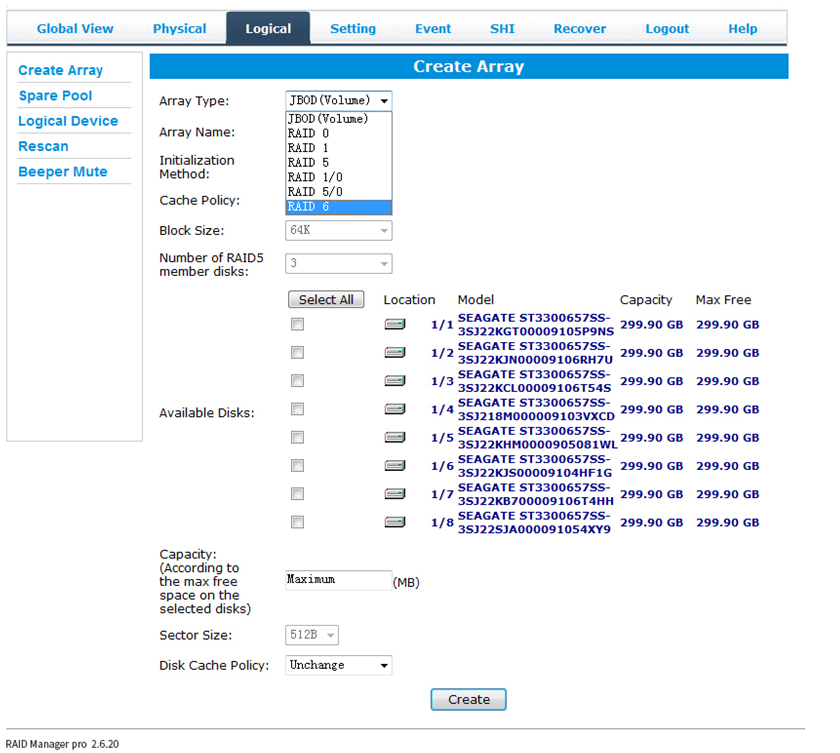
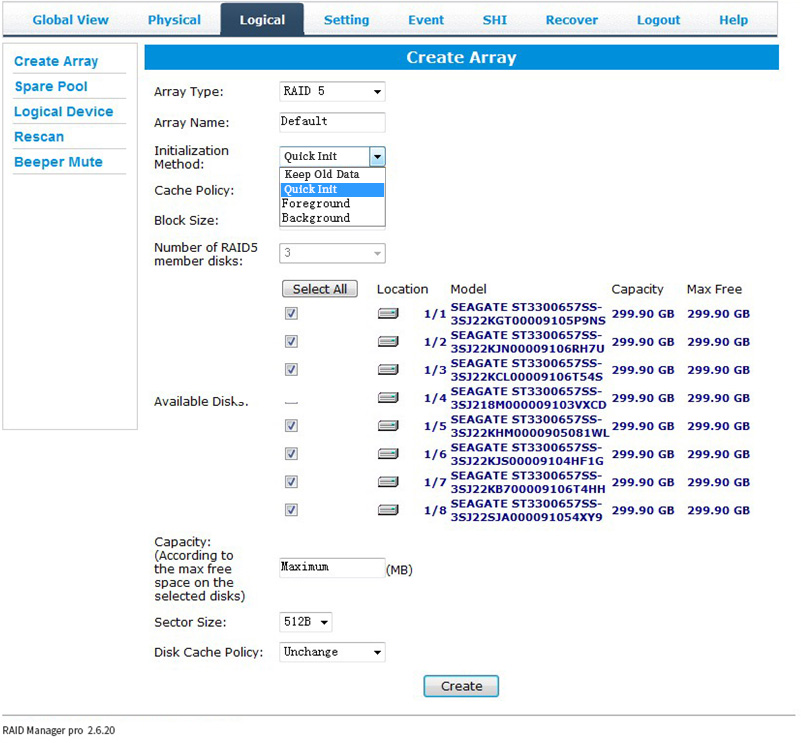
Initialization Method: Initialization mode and available options: Keep Old Data, Quick Init, Foreground, and Background.
Keep Old Data:
This is the default mode, as it guarantees data security and avoids data loss due to operator error. This option does not require initialisation of the disk array, and newly purchased disks can be used directly to create a RAID without initialisation. This option can also be used to restore an unusable disk array.
Quick Init:
The created disk array is immediately accessible. This option deletes the partition table on the hard disk without initialising the disk array. Newly purchased disks can be used directly to create a RAID without initialisation.
Foreground:
This option deletes everything on the hard disk. The initialisation time is shorter than for the "Background" option, and the logical disk is not recognised by the system until this initialisation is complete. The disk array is thus unavailable until the initialisation of the disk array is complete.
Background:
This option deletes everything on the hard drive and takes the longest time to initialise; however, the logical disk can be used during initialisation.
NOTE: If you cannot completely delete the hard disk partition and some of the hard disk capacity becomes unusable, please check if you have selected “Quick Init” in “Initialization Method”.
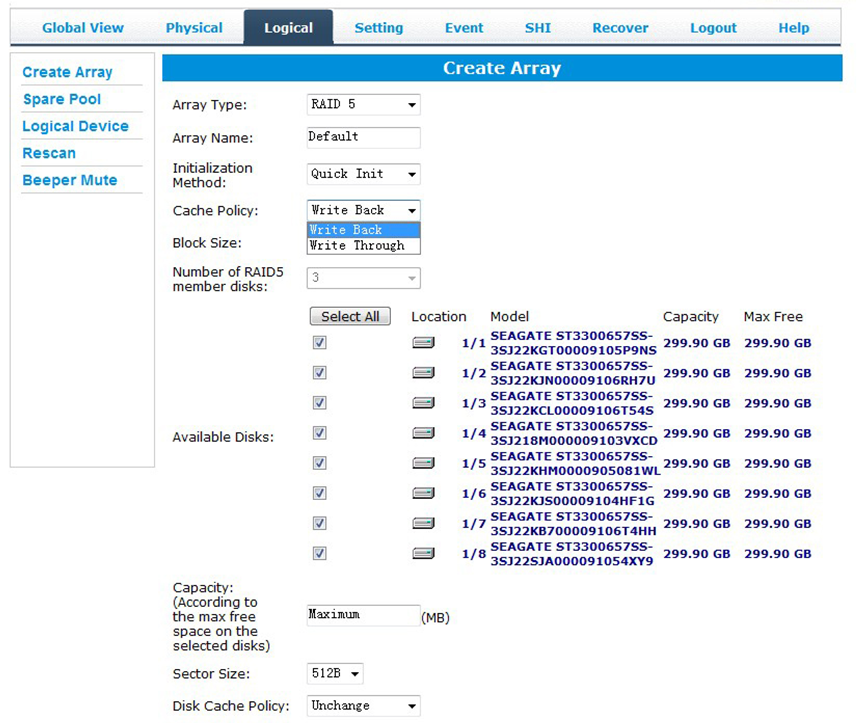
Cache Policy:
Write Back: This option enables RAID caching to provide higher write performance for RAID arrays. Data is at risk whenever the power is down if system anomalies occur, however.
Write Through: Data is written directly to the hard disk, which provides high levels of data protection.
Block Size: The 64K block stripe size is the best choice for many applications; however, it is possible to adjust the size of the RAID block to meet different needs.
Number of RAID 5 member disks: Sets the number of hard drives used for RAID 5.
Select All: Selects all hard disks to create a single RAID array.
Logical Device Information
When the RAID is created, the disk array information is displayed in the Logical Device Information section.
The newly created disk array's information includes
Name: RAID name
Type: RAID type
Capacity: Total capacity of the RAID
Block Size: Block size of the RAID
Sector Size: Sector size of RAID
OS Name: Name of logical drive identified by the OS
Status: RAID status, including Normal, Critical, Disabled, Rebuilding, Verifying and Expanding/Migrating.
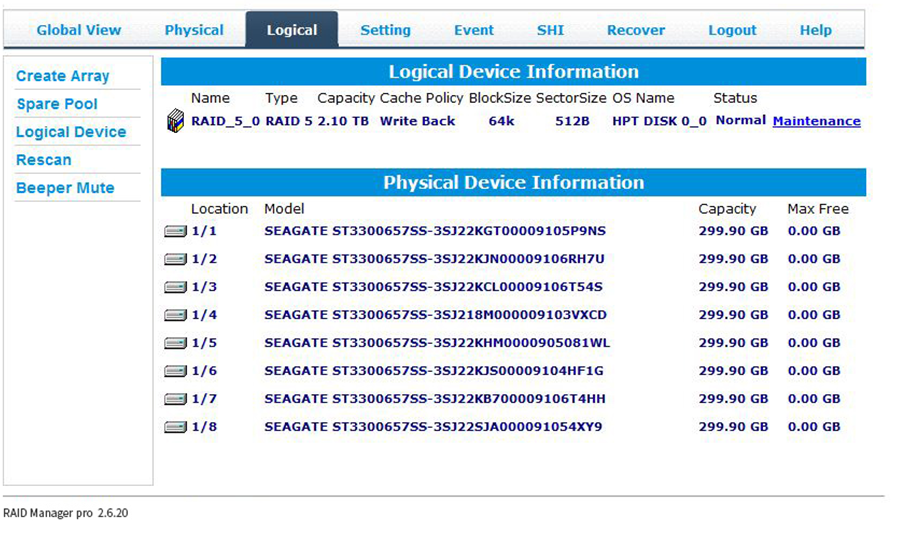
Maintenance:
Maintenance of the disk array. The operational procedures required differ by RAID status:
1) If the RAID status is "Normal", a "Verify" button will be available.
2) If the RAID status is "Critical", an "Add" button will be available.
3) When "Add Disk" is selected, a "Stop" button will appear.
Delete: This deletes the selected disk array.
Unplug: Allows the user to power off and safely remove the disk array
Rebuild: After adding a new hard drive, the rebuild command is used to bring a RAID in the critical state back to normal.
Change Cache Policy: This allows switching between Write Through and Write Back.
Write Through: Data is written directly to the hard disk; write performance is relatively low, but data will not be lost due to power failures or other unexpected situations.
Write Back: This enables RAID write caching; however, this may result in partial data loss in the event of any unexpected power outage or other operating system exception.
Rename: Allows renaming of the disk array.
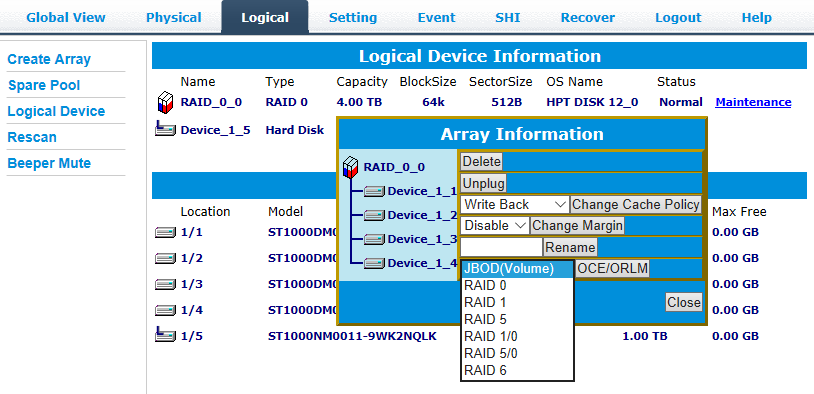
OCE/ORLM: On-line expansion or migration of disk arrays. Note: Mac OS computers do not support RAID online expansion and migration.
The guidelines below support online disk array expansion or migration:
(i) Power on the RAID, and insert the new hard disk. The RAID will detect the new hard disk and display the following examplemessage: "Device _ 1 _ 5 Hard Disk". Click "Maintenance" in the Array Information menu, then click the "OCE / ORLM" button, and select the array mode (all other options retain the default configuration). Then click the "Close" button.
Note: RAID can only migrate from low-level to higher-level modes, such as JBOD to RAID 1, JBOD to RAID 5, RAID 1 to RAID 5, RAID 5 to RAID 6.
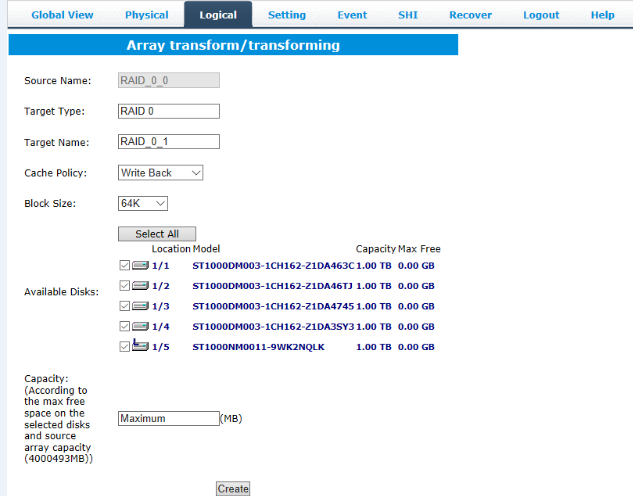
(ii) In the” Array Transform/Transform” menu, use the checkboxes to select the hard disks that are required to participate in building the new RAID array (all other options remain in the default configuration) from the “Available Disks” list, and then click “Create” to confirm.
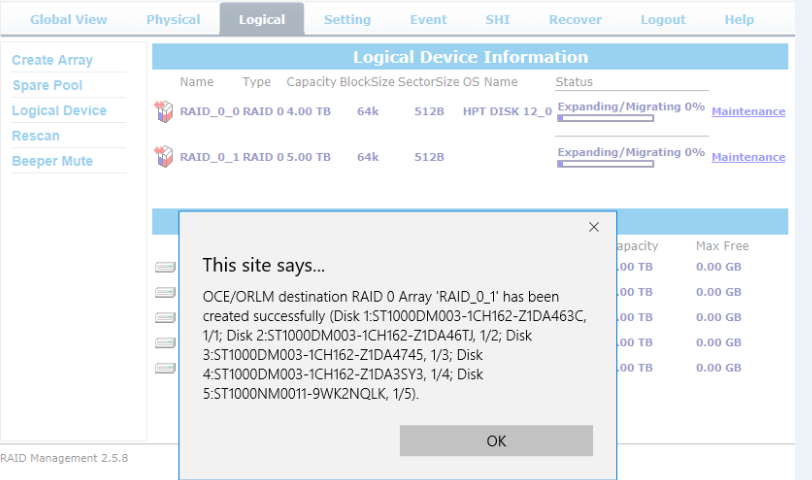
(iii) When the menu shows the Expanding / Migrating bar at 100%, this indicates a successful RAID expansion or migration.
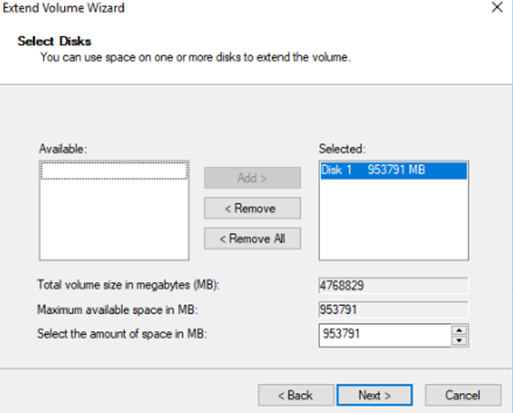
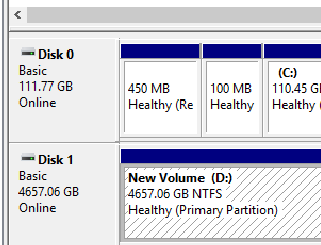
(iv) Go to the “Disk Management” menu on your Windows computer, then right-click on "New Volume", and select “Extend Volume…” from the drop-down menu.
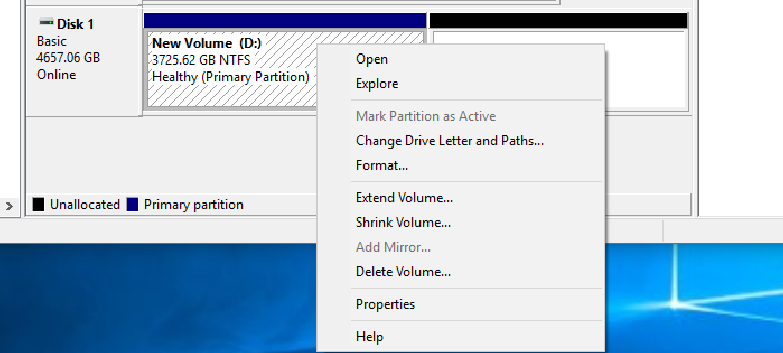
(v) Follow the system prompts to complete the process.
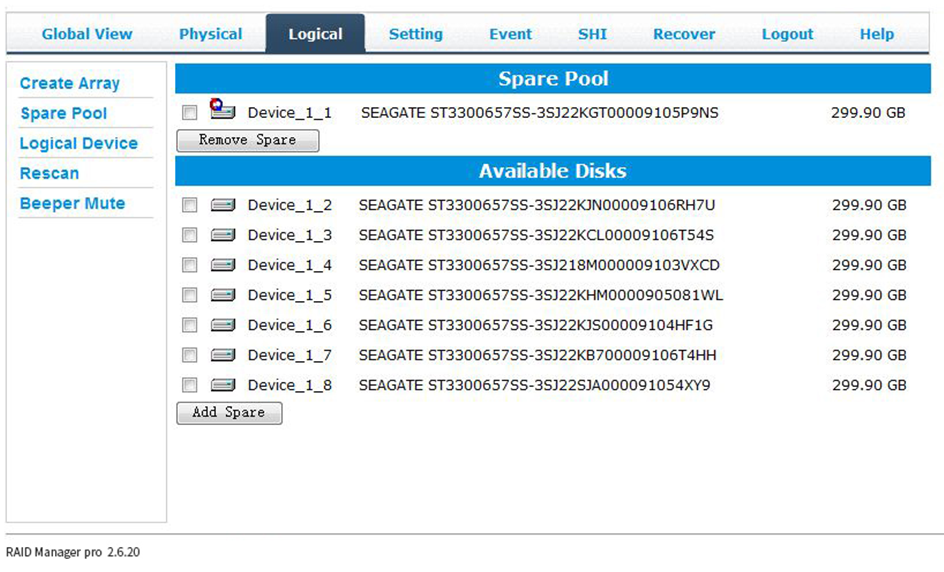
Spare Pool
Spare Pool:
This allows set up of a hot spare pool. This means that when a hard disk in the array fails, the spare hard disk (hot spare) can thus be automatically loaded into the array to replace the failed hard disk, improving data security.
Logical Device
Logical Device: Displays all disks.
Rescan:
Press the "Rescan" button to get the latest information for all disks or arrays in the device.
Beeper Mute:
This temporarily disables the internal buzzer.