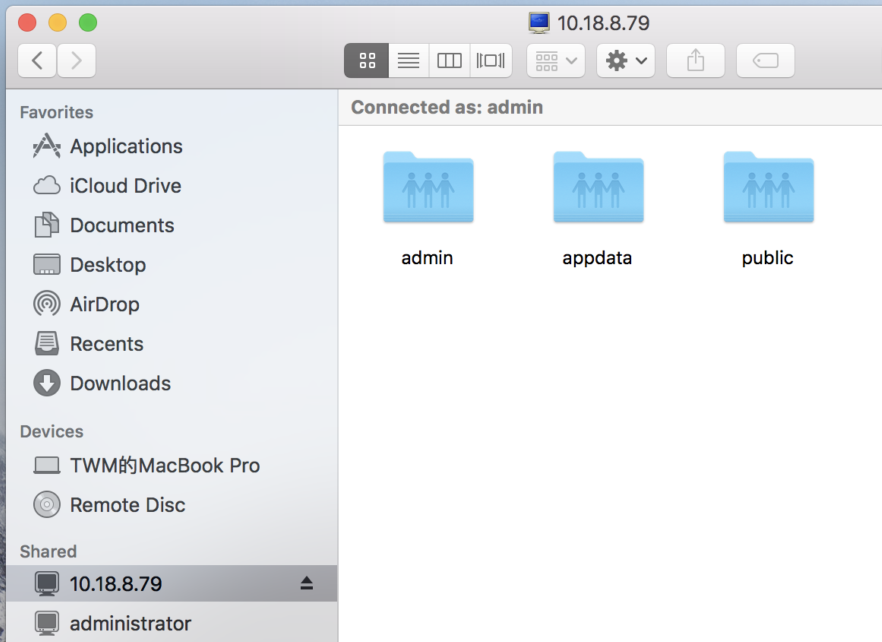
When storing files to TNAS on your local network, we recommend that you use either (a) Windows OS Samba File Service or (b) Mac OS AFS File Service. In this way, you can store files more conveniently and efficiently.
Save A File From A Windows PC To TNAS
There are several ways you can store files to TNAS using your Windows PC.
Via TNAS PC
TNAS PC is a desktop application that allows you to find TNAS devices and store files quickly.
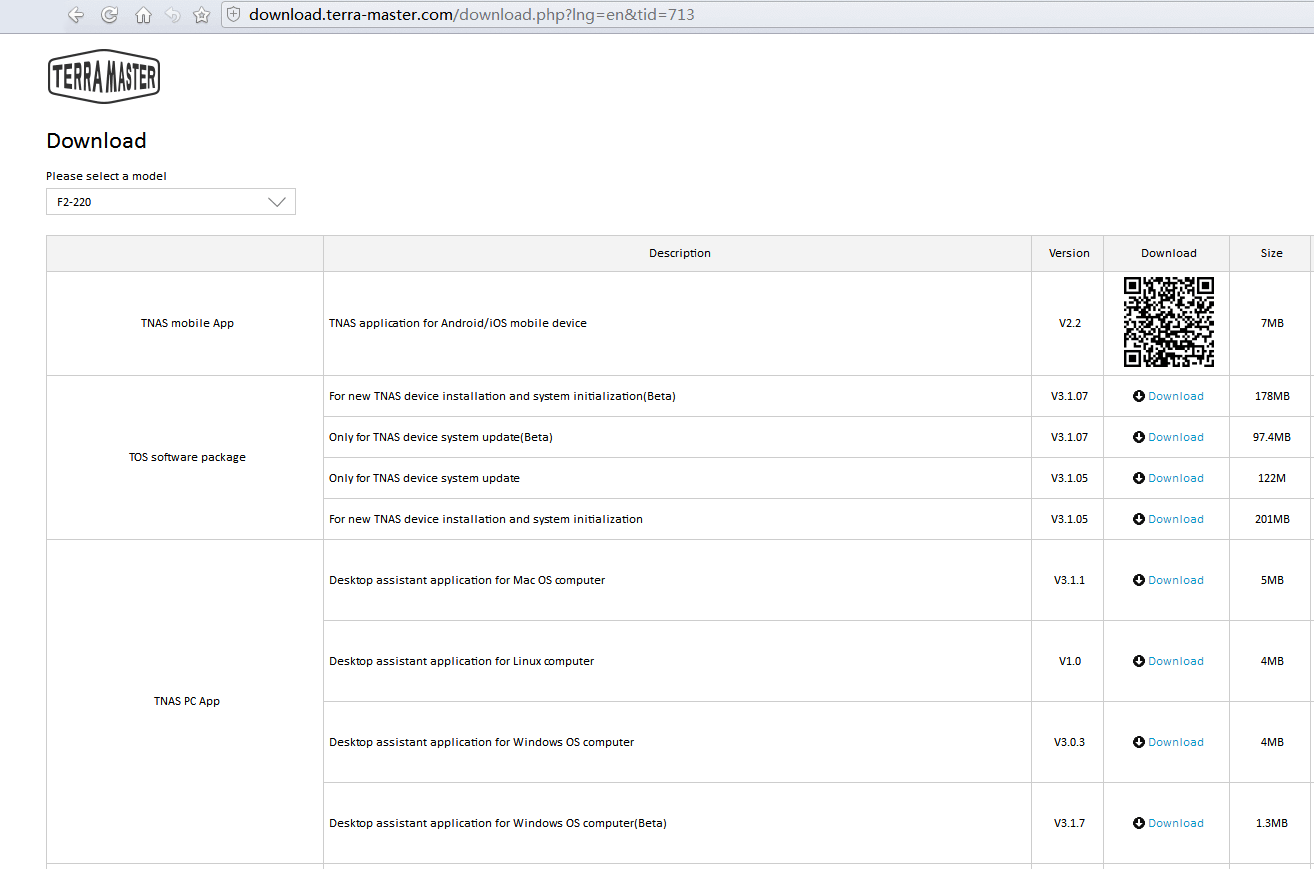
1. Install the TNAS PC Desktop Application on your computer. You can download the application free of charge on TerraMaster’s official website.
2. Locate your TNAS device on the network. To do this, run TNAS PC and click “Search”.
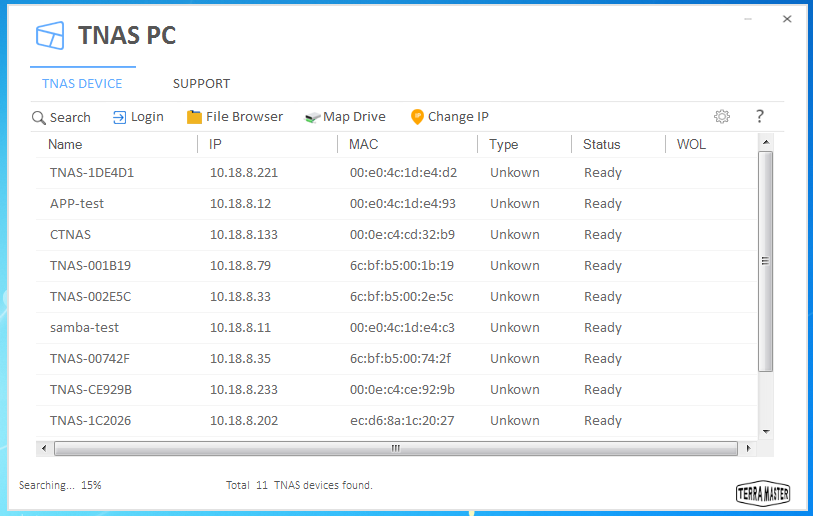
3. Select your TNAS device from the search list and click “File Browser”.
4. Enter your username and password. To heighten the convenience of your next visit, please tick “Remember My Credentials”.
5. If you entered your username and password correctly, the page will jump to the file browsing page where you can store, copy, delete, and edit your files.
Via TNAS IP Address
You can use the TNAS IP address to access TNAS storage space and store files. To do this, please follow the instructions below:
1. Open the Windows File Explorer and enter \\TNAS IP address in the address bar (e.g., \\ 192.168.0.18).
2. Enter your username and password and click “OK”. To heighten the convenience of your next visit, please tick “Remember My Credentials”.
3. If you entered your username and password correctly, the page will jump to the file browsing page where you can store, copy, delete, and edit your files.
Map a Network Drive
For folders that you need to access frequently, you can map a network drive for that folder to increase ease of access.
Use TNAS PC to Map Network Drives
1. Select your TNAS device in the TNAS PC application, and then click “Map Drive”.
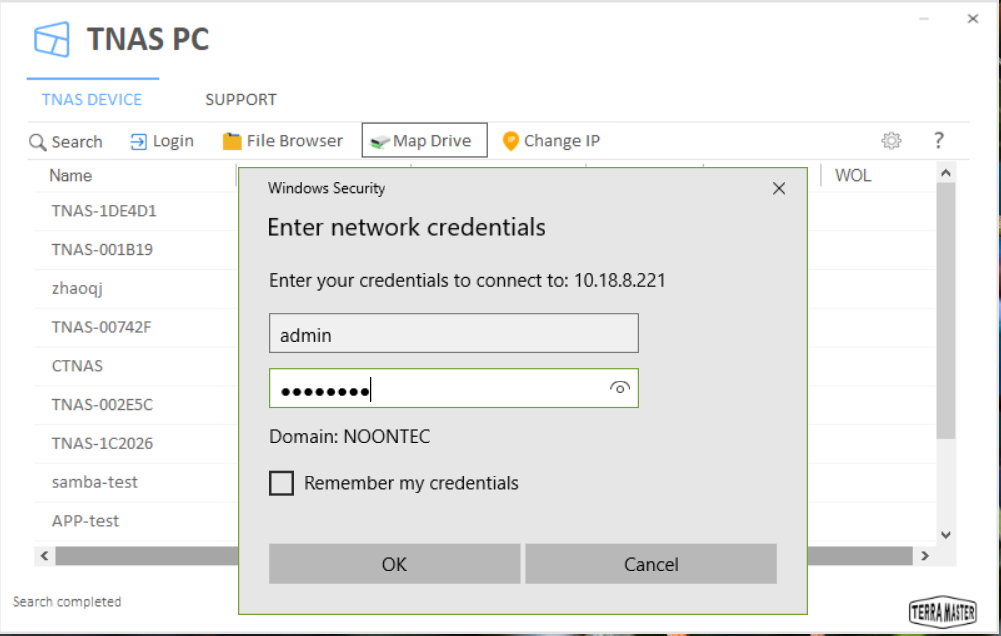
2. Enter your username and password and click “OK”.
3. Select a network drive letter, and then select the TNAS shared folder you want to map. Click “OK”.
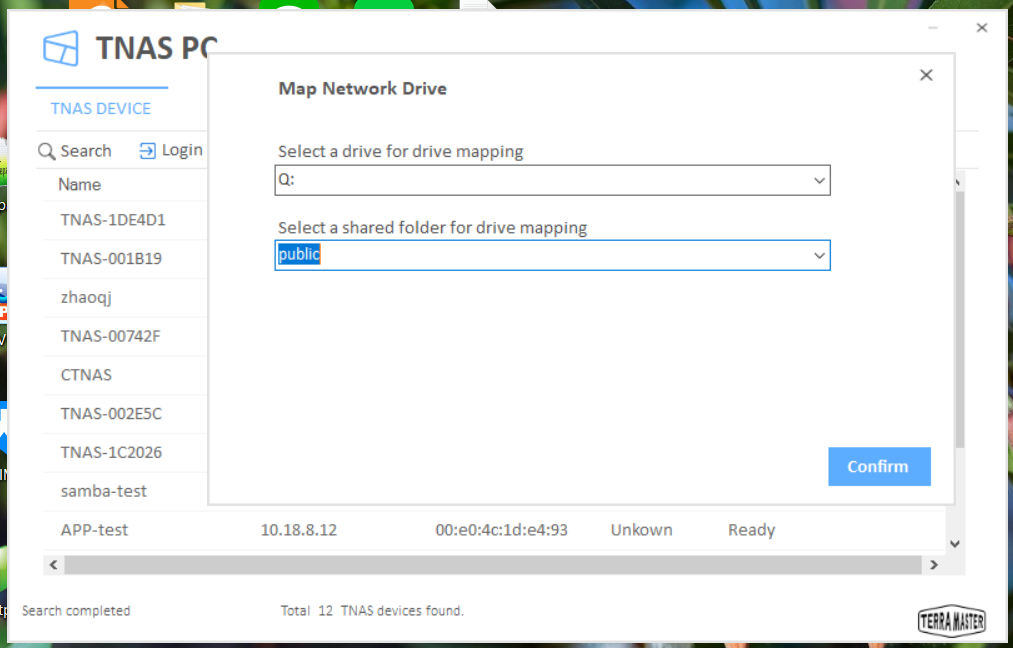
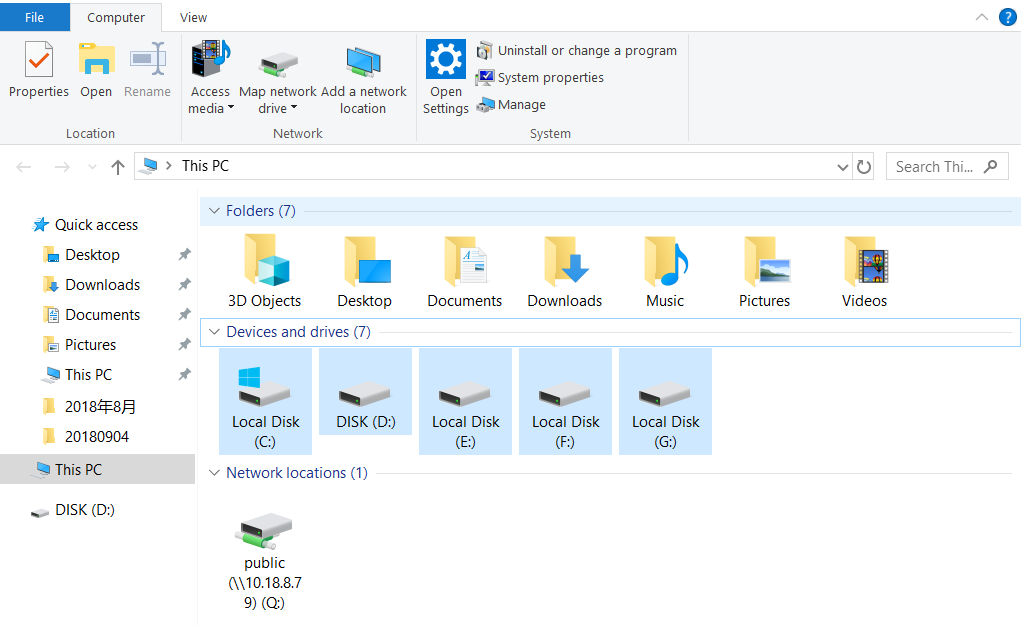
4. Open your computer’s file explorer, and then locate the drive you just mapped. Now, you can store, copy, delete, and edit your files.
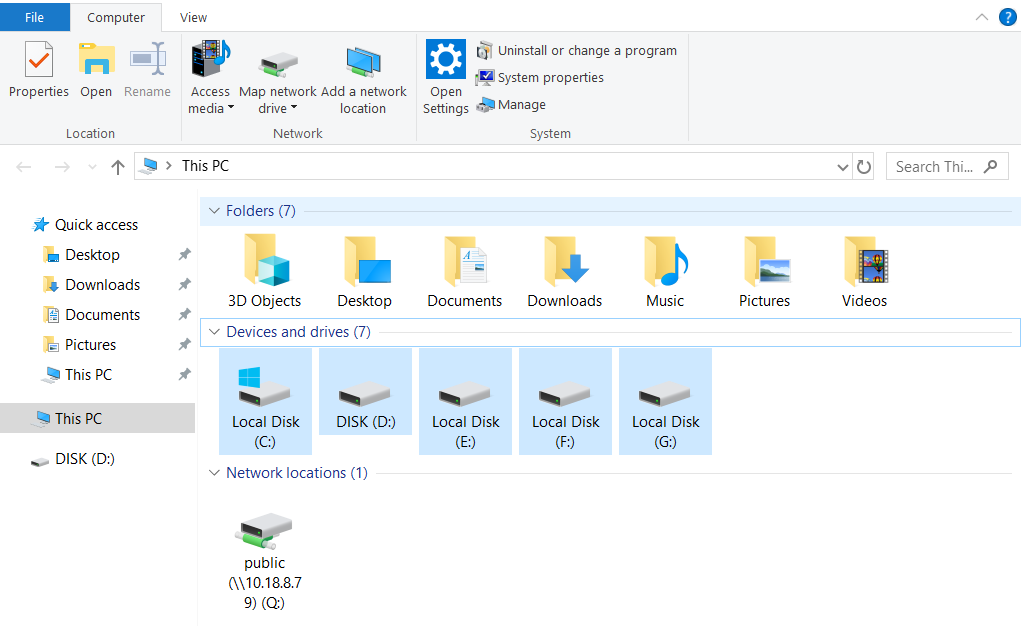
Use Windows Explorer to Map Network Drives
1. On your Windows OS desktop and right-click “This Computer”.
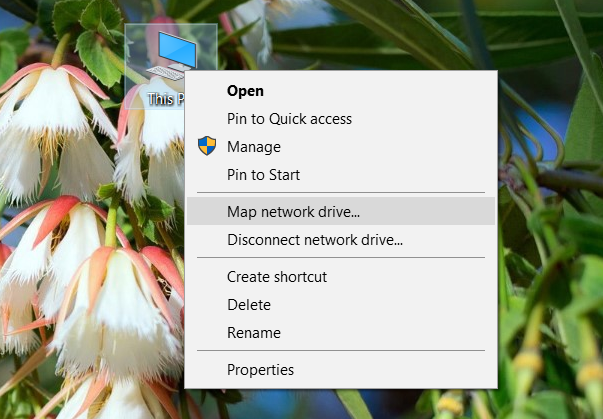
2. Choose “Map Network Drive” from the dropdown menu.
3. Select a drive letter from the drop-down menu and enter the path to the TNAS shared folder in Folder Options (e.g., \\192.168.0.10 \public, where 192.168.0.10 is the IP address of your TNAS device and public is the name of the shared folder in the TNAS device). Click “Finish”.
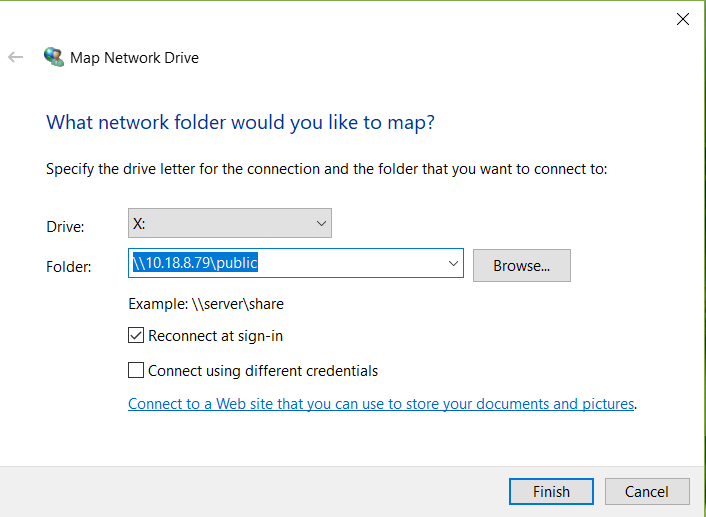
4. Enter your TOS username and password in the menu and click “Confirm”.
5. Open your computer’s file explorer and locate the drive you have mapped. Now, you can store, copy, delete, and edit your files.
Save Files From Your Mac Computer to TNAS
Mac OS PC users can also use the TNAS PC Desktop Client to manage TNAS files. This is done in a very similar way as is the case for Windows OS PCs.
Using Mac OS AFS File Service to Store Files
Here's how to use the Mac OS AFS File Service to store files to TNAS:
1. Open your Mac PC and click “Finder”.
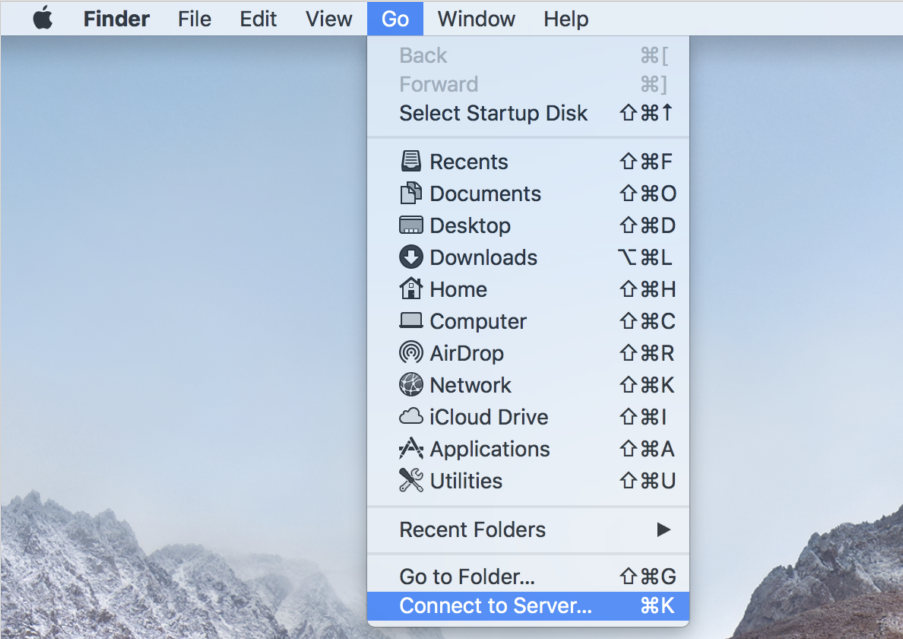
2. Click “Go” in the menu at the top of the screen and choose “Connect to Server”.
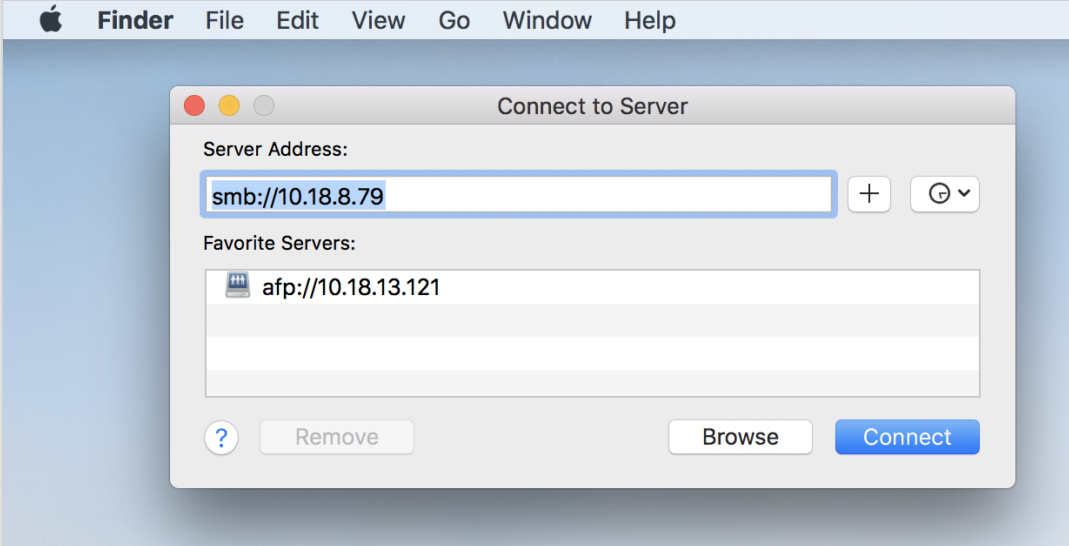
3. Enter the TNAS IP address in the pop-up menu, starting with "afp://" (e.g., afp://192.168.0.11). Click “Connect”. To heighten the convenience of your next visit, click the plus button “+” in the menu to favourite the server.
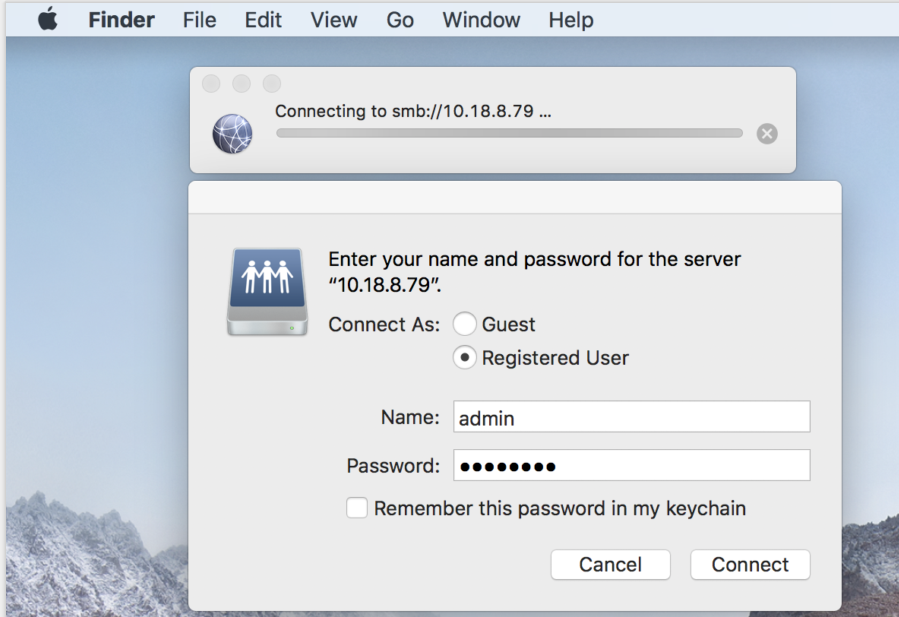
4. Enter your TOS username and password and click “Connect”.
5. If you enter your username and password correctly, you'll see your TNAS device in the Shared list of the Finder window. Double-click the shared folder to view its contents and to store, copy, delete, and edit your files.
